Where can I find it?
SIDE PANEL > TourCMS Shop > Analytics > GA4
What does it mean?
This document guide walks you through the process of migrating an existing Universal Analytics implementation to use GA4.
Our WordPress plugin is fully integrated with Google Analytics, which provides comprehensive insights into website traffic, user engagement, and conversion rates, allowing businesses to understand their audience and optimise their online presence.
Enable Google Analytics 4 (GA4) to track e-commerce data and user interactions. Setting this up is vital for understanding your website's performance and customer behaviour, which in turn helps you to optimise your marketing and sales strategies. The data you collect here can be used to identify popular tours, track conversion rates, and better understand your audience.
What should I do?
Below are the steps and instructions to activate the GA4 on your website.
Install Site Kit
- Install Google Site Kit Plugin. (Google Reference)
- Log in to the word press website.
- In the left navigation menu, click Plugins.
- Click Add new at the top of the Plugins page, then search for "Site Kit".
- Click Install Now on the Site Kit by Google

Configure Site Kit
- Once the plugin is installed, from the menu on the left, click Plugins.
-
Under "Site Kit by Google", click Activate.
-
Once the plugin is activated, on the left hand side, click Site Kit.
-
Click Sign in With Google.


- Select the Google account with an existing Google Analytics property.
- Grant access to Google account data by clicking Allow
- Click Go to my Dashboard to continue.
- From the menu on the left> Site Kit> Dashboard.
- Choose your pre-existing GA4 analytics property or create GA4 Analytics property then click Configure Analytics.
-
In the Analytics section, click Connect Service and follow steps
-
Step 1
-
Step 2
-
Step 3
-
Step 4
-
Step 1
-
Connect Tag Manager: It is a required step to trigger GA4 ecommerce events.
- Create the custom events (Google Reference) in Tag Manager. It is a required step to send ecommerce data using a data layer to Analytics.


Configure GA4 tags in Google Tag Manager
-
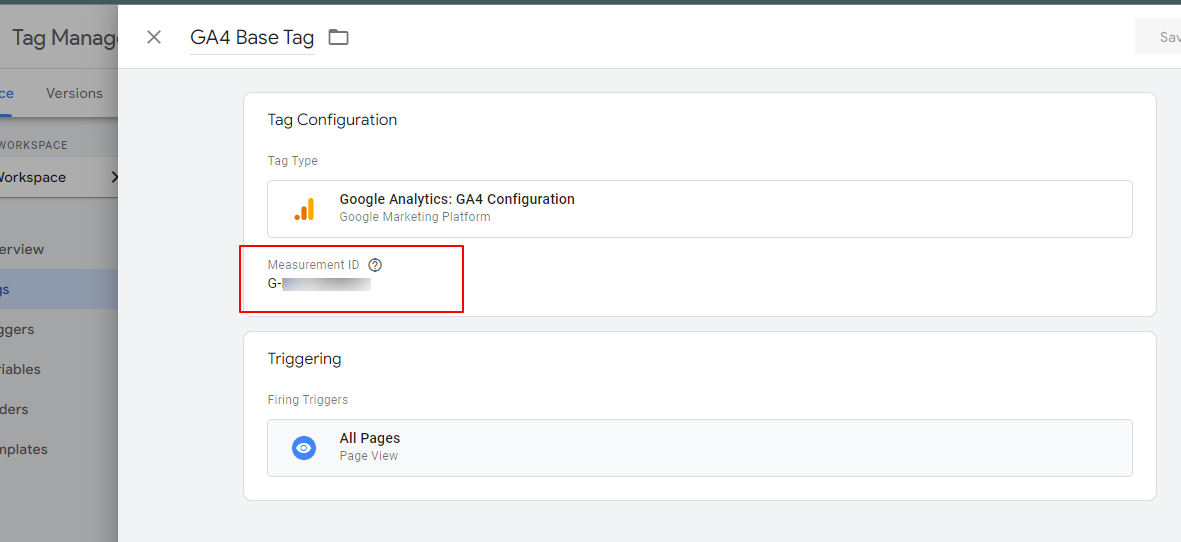
Login to https://tagmanger.google.com
- Create new tag “GA4 Base Tag”
- Select Tag Type Google Analytics: GA4 Configuration
- Add Measurement ID (How to add Measurement ID?)
- Choose Trigger - All Pages
- Save the configuration
- Verify the tag is working from Preview section
Ref - [GA4] Configure Google Analytics 4 tags in Google Tag Manager
Create custom events in Google Tag Manager
This article explains how to create custom events in Tag Manager.
Switch to GA4 in the TourCMS Shop plugin
Go to TourCMS Shop > Analytics > GA4
You have three options for e-commerce tracking:
- GA4 (data layer): This is the recommended and most modern option. It works by sending information to the Google Tag Manager (GTM) data layer, allowing for highly detailed and customisable tracking. To use this, you must have GTM set up and correctly configured on your website. This method is ideal for those who want granular control over the data they collect.
- Standard Tracking: This is a simpler, more traditional method for e-commerce tracking. It directly sends basic e-commerce events to Google Analytics without the need for a data layer. While less flexible than the data layer option, it is a straightforward way to get essential e-commerce data.
- None: Select this option if you do not wish to use the plugin to track any e-commerce data with Google Analytics.
For adding the main GA4 tracking code to your site, you should use the provided guide on how to add tracking code to the rest of your site. This will ensure that all pages, not just the e-commerce related ones, are being tracked correctly.